gogo - PicoCTF - Walkthrough
You are tasked to reverse engineer a go binary
Description
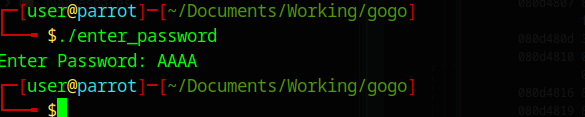
Hmmm this is a weird file… enter_password. There is a instance of the service running at
mercury.picoctf.net:4052.
This is a CTF challenge in the picoGym. The challenge is rated as Hard and is a reverse engineering challenge.
Walkthrough
I start my investigation about “what the binary is doing” by running a simple strings on it.
There are quite many strings and other printable data in the binary which is a good sign, because it may include debugging information. Particularly interesting are the fmt. strings which indicate that this is probably a Go binary as the name already hints. I next loaded the binary into Ghidra and started by inspecting the main.main function.
I inspected the first view strings which are printed with the Printf function and they matched the strings which are printed if I execute the program:
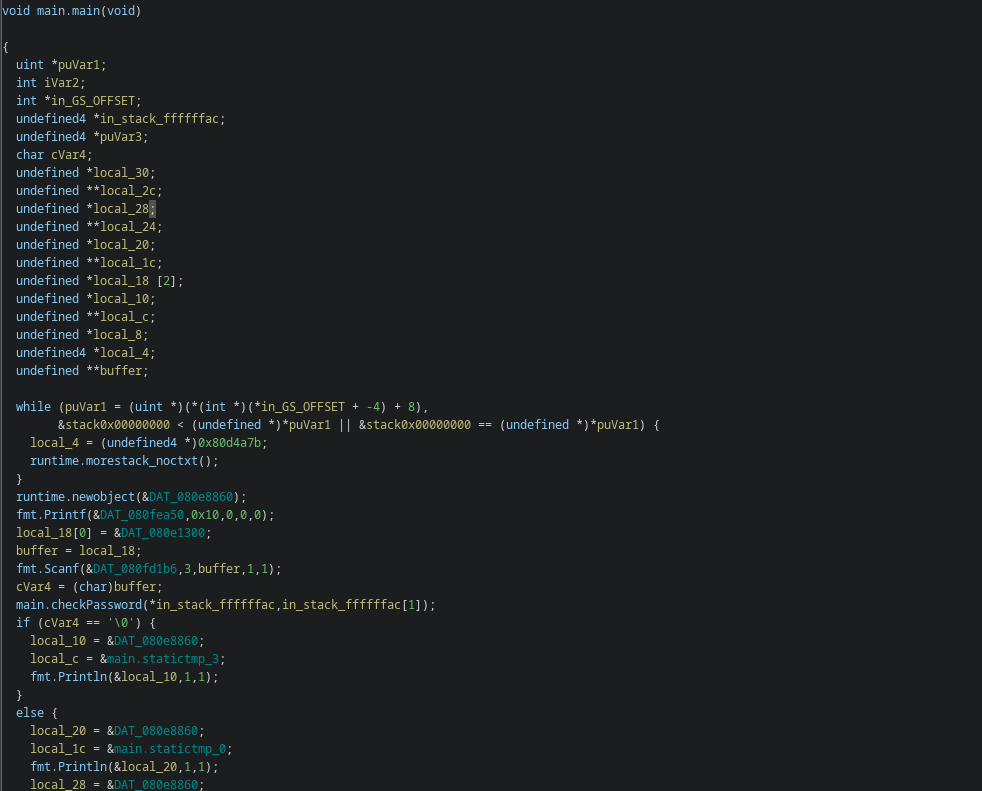
So if we look closer to the code and get a high-level understanding of what it is doing, we can conclude that the binary is used to input a password and then apparently the function checkPassword is executed. The decompiled call to the function main.checkPassword looks quite broken in the Ghidra decompiler, but let’s ignore this for a moment. The only thing to remember is that the function is called with an argument. Th next thing to do is inspecting the main.checkPassword function:
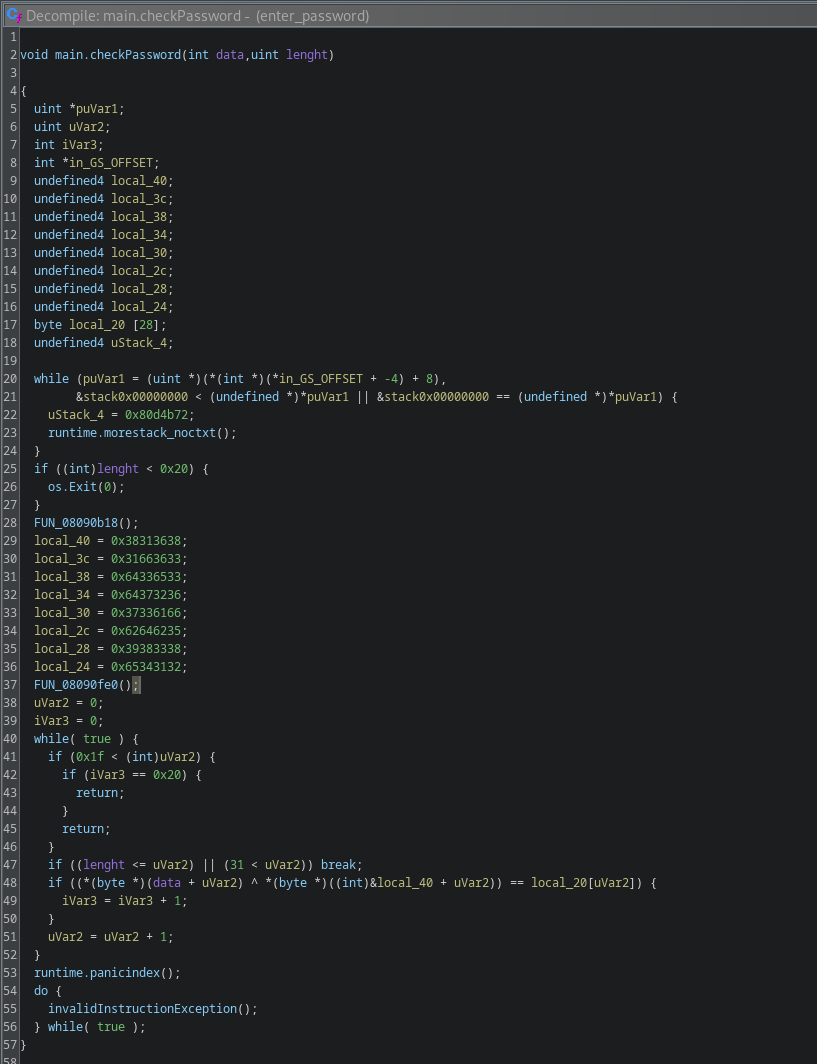
The code looks quite destroyed , this is a common problem in reverse engineering, you simply can’t recover the code 1:1 you need to make assumptions and think about what the reason for the destroyed code could be.For example in this code the variables local_40 to local_24 clearly represent a string, you can see that because of the hex numbers which are numbers and characters. So let’s highlight the key-points of what that code is doing:
- The first part assigns variables.
- The first
whileloop I simply ignored because it is common for Ghidra to add useless code and this looks like some memory checking code. - The
ifchecks probably if the length of the input is right in size,0x20or32. - The next part assigns the string data from these hex numbers.
while (true)XORs the inputdatawith the string created from the hex numbers. This XORed data is then compared with thelocal_20, so this probably is the solution for finding the key. If the key matches the XORed data it continues and increases the counter.
Let’s continue, the next question I asked myself is: Where is the local_20 assigned and what is in this part of the stack while execution?
Before I start answering these questions I loaded the binary in IDA. It is always good to have a different decompiler running because each decompiler has advantages and disadvantages.
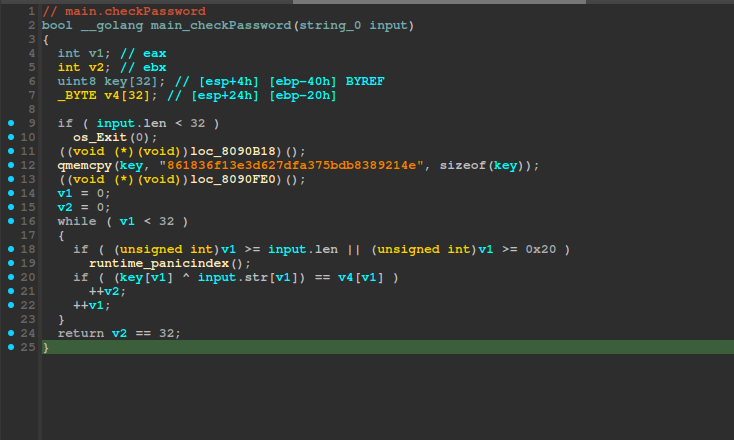
The IDA code looks much better: We see that we have a string which is copied, then XORed and compared. At this point I go curious what the string could be and simply googled it, it looks like a MD5 or so.
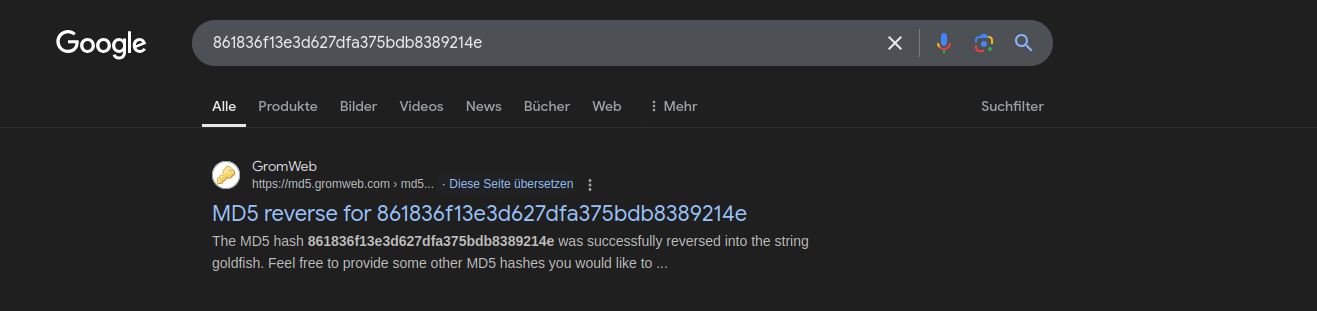
Ok, apparently this hash is reversed goldfish. I now checked this as a password. I doesn’t work, but let’s keep this in mind.
The next thing I did is starting the binary in pwndbg so we can step through the binary and check the different actions taken by the binary.
With some back checking in IDA I searched for a sweet point to debug the program.
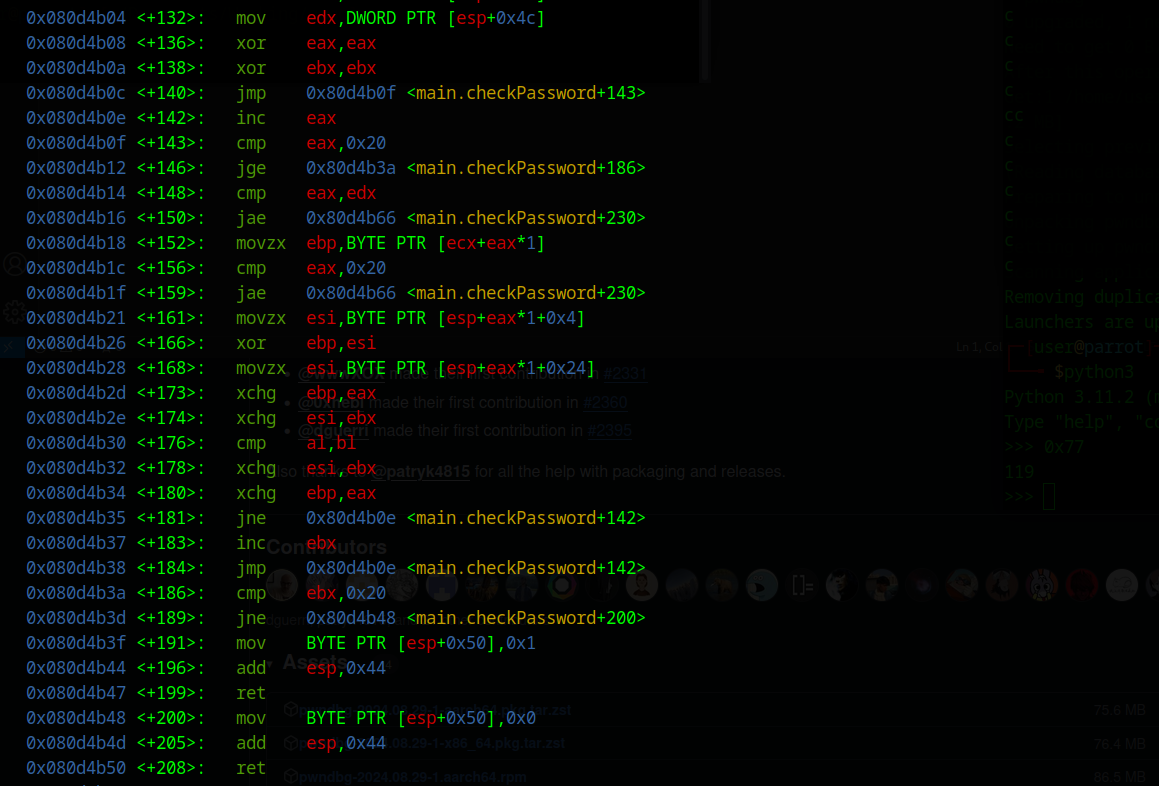
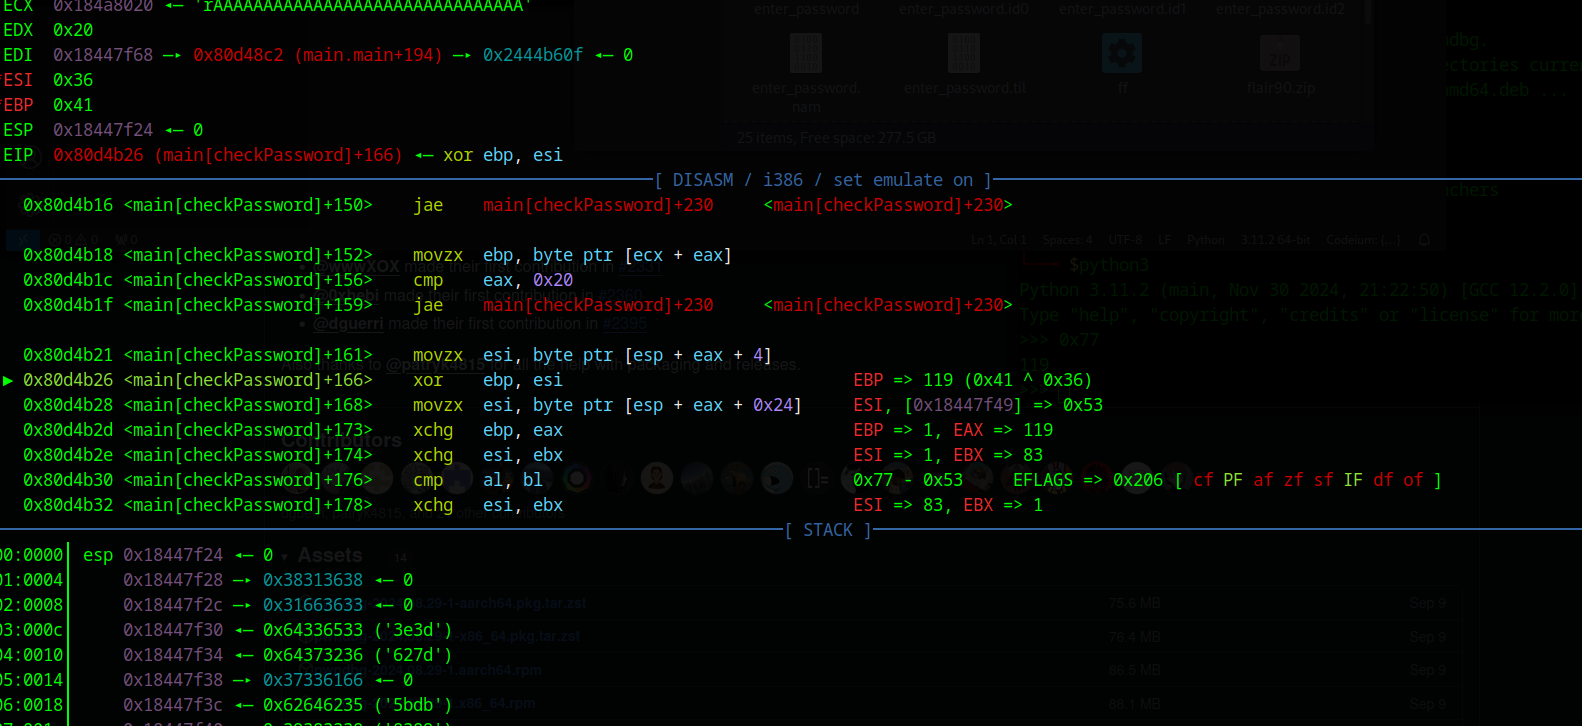
The XOR in line +166 looks pretty promising. There are two variables from a memory address XORed. After that the result is stored in eax adn ebx, with the operator xchg now the bytes in eax and ebx are compared with cmp al, bl, which is the compare with the local_20 from Ghidra. I set a breakpoint at this address 0x80d4b2d which is +173. I did that because pwndbg makes it in contrast to gdb very easy to see the next instructions and the results.
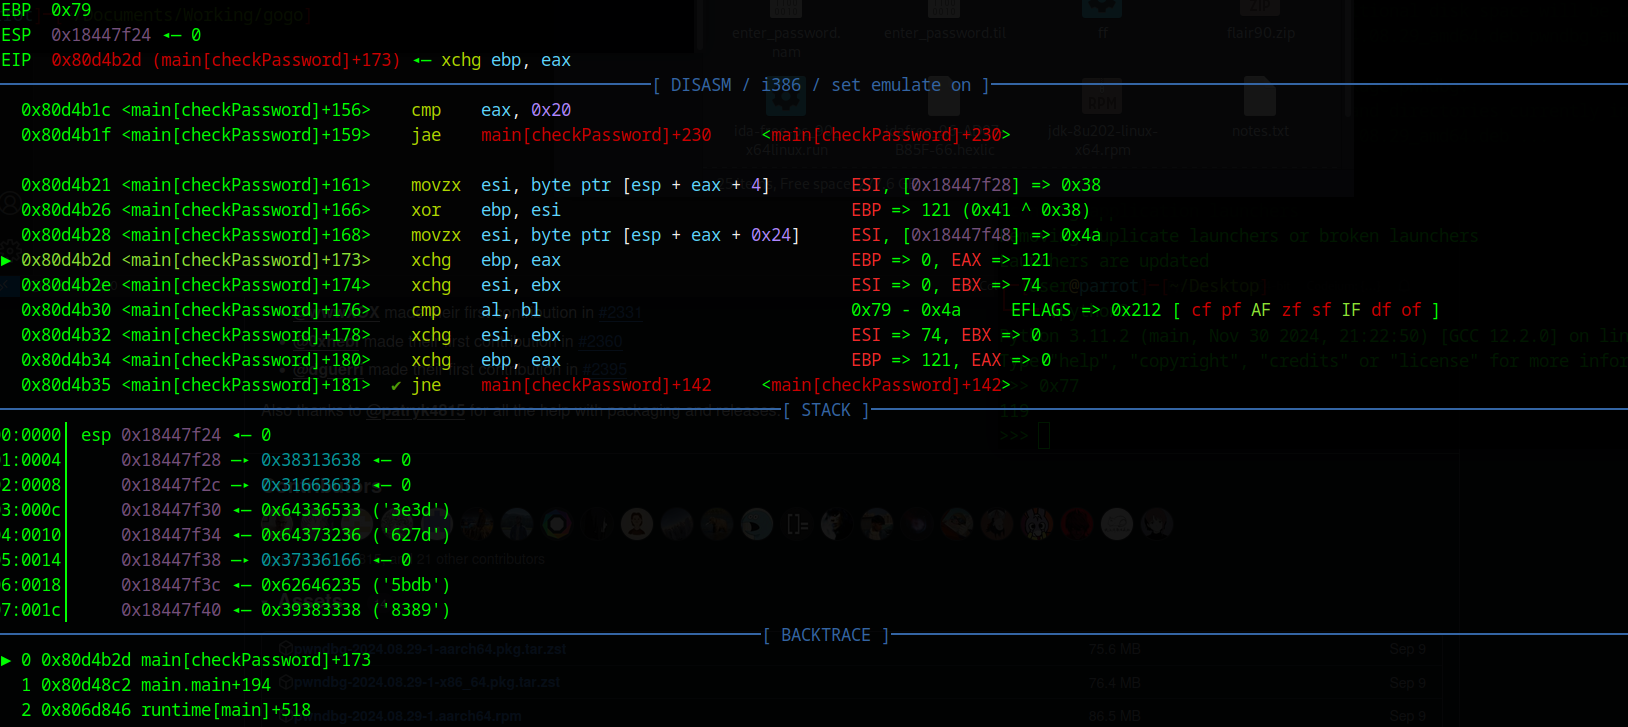
The first run looks good, in the first round of the loop we XOR 0x41 which is the first of my 32 inputed AAAAAAAAAAAAAAAAAAAAAAAAAAAAAAAA’s with 0x38 which is the first hex number from the string we found in Ghidra. The result 121 or 0x79 is now subtracted from 0x4a which is likely the first character of the string local_20. So if we make a small draft what we need we come to this equation:
1
hash_character XOR input_character = secret_string (aka local_20)
So to get our input character we just need to XOR the secret string character with the hash character. I now XORed the 0x38 with the 0x4a this gave me 114 which is a r in ASCII.
Note: python is extremely helpful when solving these challenges, you can use chr(number) and ord("c") to convert characters to numbers and numbers to characters.
Now I restarted the binary with run in pwndbg. This time I added modified the first character to a r as the password.
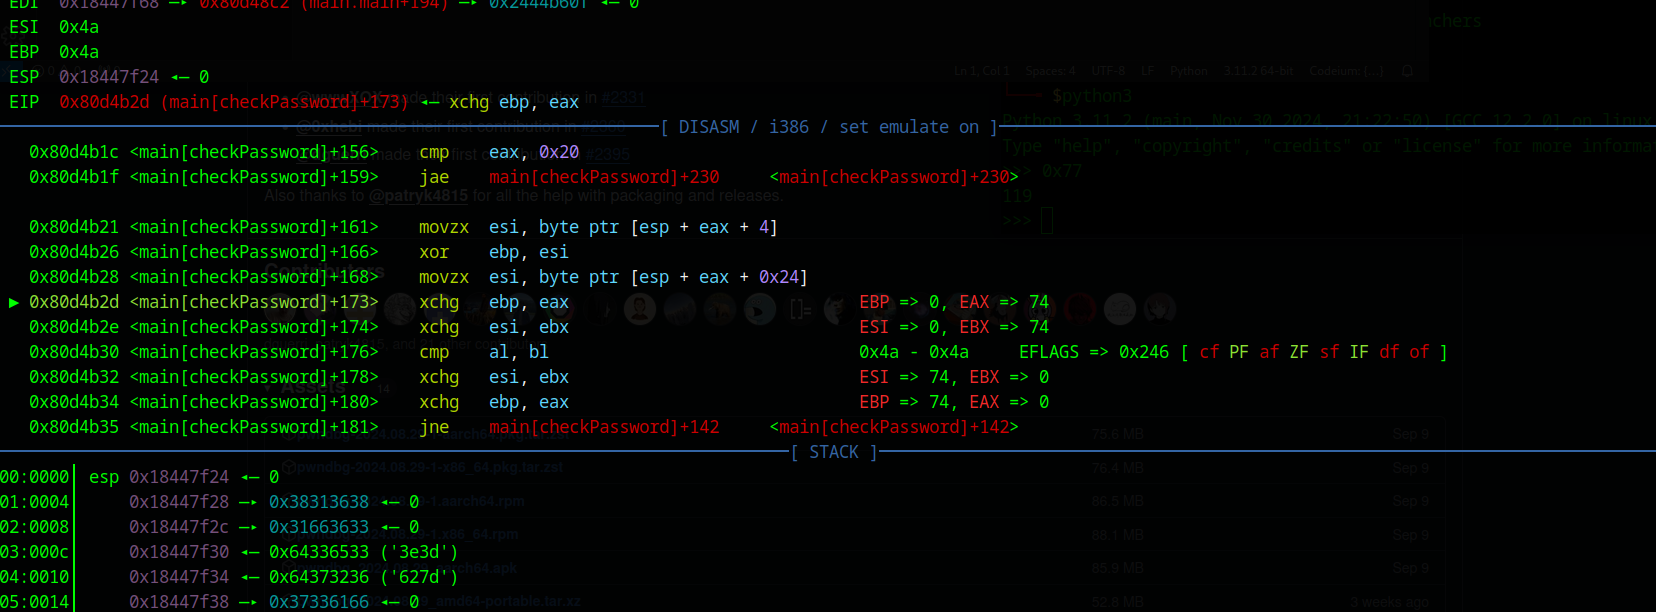
The comparison now equals 0 which is excellent. So the first character is right, I continued the execution with c and then inspected the new equation.
This time we need to XOR 0x38 with 0x4a which is an e in ASCII, you can use this command in Python chr(0x36^0x53). I now started the binary again and checked the second character and it worked, so the password starts with re. With that information I repeated the process 30 times (You probably can run the code one time and get all characters, but I’d like to check if they really work or if I made a mistake).
Note: I modified the breakpoint during that process to 0x80d4b26 because all of a sudden pwndbg decided to not output the numbers anymore…
After about 10 minutes I came to this password (I removed some characters): reversAAAAAAAAAAAAAAAAAAAforward. If we now run the program, we should get further.
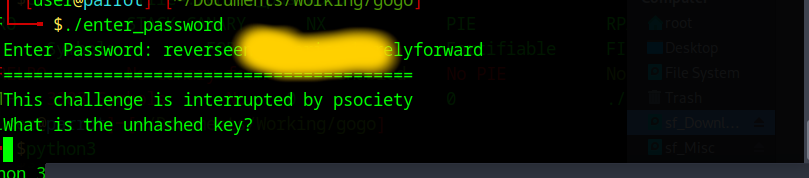
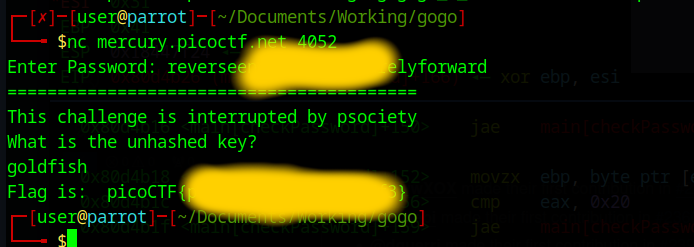
Now they are asking for another key, weird, I just now tried the goldfish password because this is probably the solution.
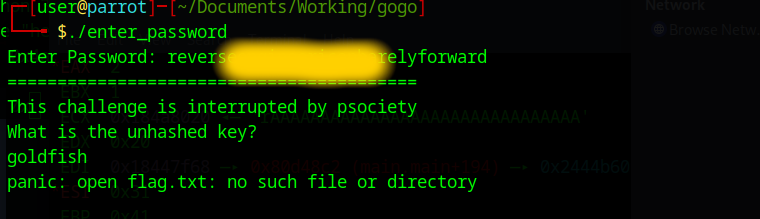
Perfect the program now tries to open the flag.txt file, this means we successfully found out the password and can connect to the server and get the flag.
I encourage you doing the challenge you self and get familiar with tools like pwndbg. In addition to that feel free to scroll through the binary, you can now really reverse engineer more because you now know what the binary does.
Conclusion
I really like the challenge because it encouraged me to use debugging to solve a reverse engineering challenge.